> ## Documentation Index
> Fetch the complete documentation index at: https://sequence-0fb8d9e6-codex-update-discord-invite.mintlify.site/llms.txt
> Use this file to discover all available pages before exploring further.
# コレクションメタデータ管理
> Sequence Collections API と Cloudflare Workers を使ってメディアを保存し、Metadata API から画像を取得して表示する方法を説明します。
所要時間:20分
このガイドでは、[Cloudflare Workers](https://www.cloudflare.com/) を使って Sequence Collections API でメディアを保存し、Metadata API から画像を取得して表示する方法を説明します。
この手順は8ステップで完了します。
1. [Sequence Builder Console](https://sequence.build) から [Secret API Key を取得](/guides/metadata-guide#1-obtain-a-secret-api-key) します。
2. cURLリクエストで [コレクションを作成](/guides/metadata-guide#2-create-collection-from-a-curl-request)(初回のみ)
3. [トークンを作成](/guides/metadata-guide#3-create-token-using-tokenid)(tokenIDを使ってトークンを作成)
4. [アセットを作成](/guides/metadata-guide#4-create-asset-using-tokenid)(assetIDを作成)
5. [画像を保存](/guides/metadata-guide#5-store-image-asset)(画像を処理して保存)
6. [非プライベートに更新](/guides/metadata-guide#6-update-non-private-token)
7. cURLリクエストで[コレクションを公開](/guides/metadata-guide#7-publish-collection-from-a-curl-request)(一度だけ)
8. cURLリクエストで[APIからアセットを表示](/guides/metadata-guide#8-render-asset-from-api-publicly)(一度だけ)
まず、[Collectible Minting Service Guideのこのセクション](/guides/mint-collectibles-serverless#1-setup-cloudflare-environment-with-wrangler-cli-and-deploy-a-test)に従ってCloudflare Workerを作成してください。
## 1. シークレットAPIキー(JWT\_ACCESS\_KEY)を取得する
バックエンドサービスを利用するには、リクエストを認証するための`Secret API` Keyが必要です。
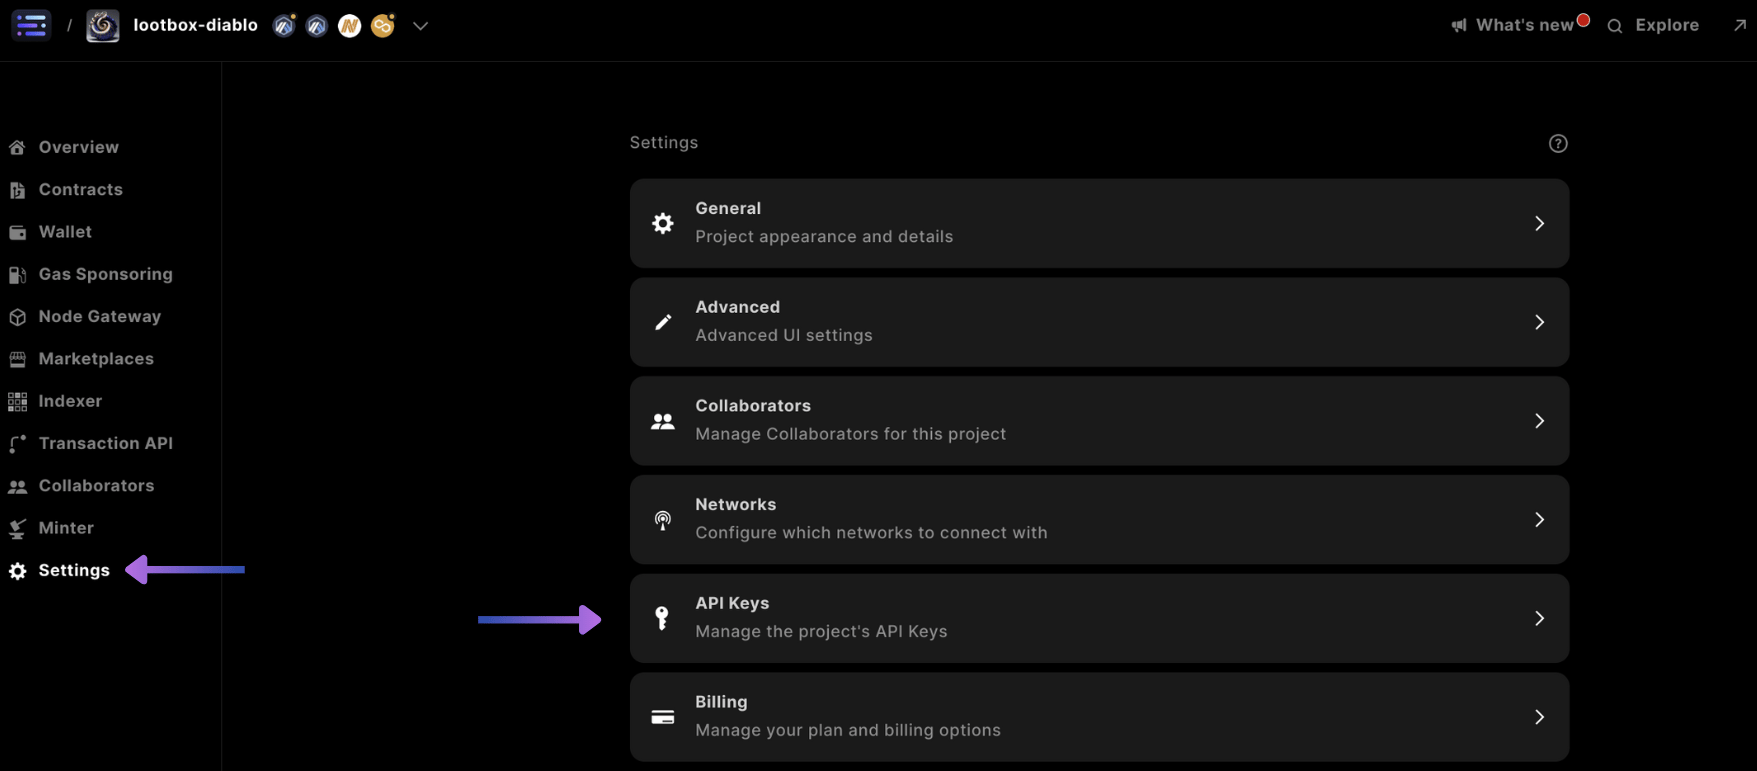
まずは設定画面にアクセスし、[Sequence Builder Console](https://sequence.build/)でAPI Keysを選択します。
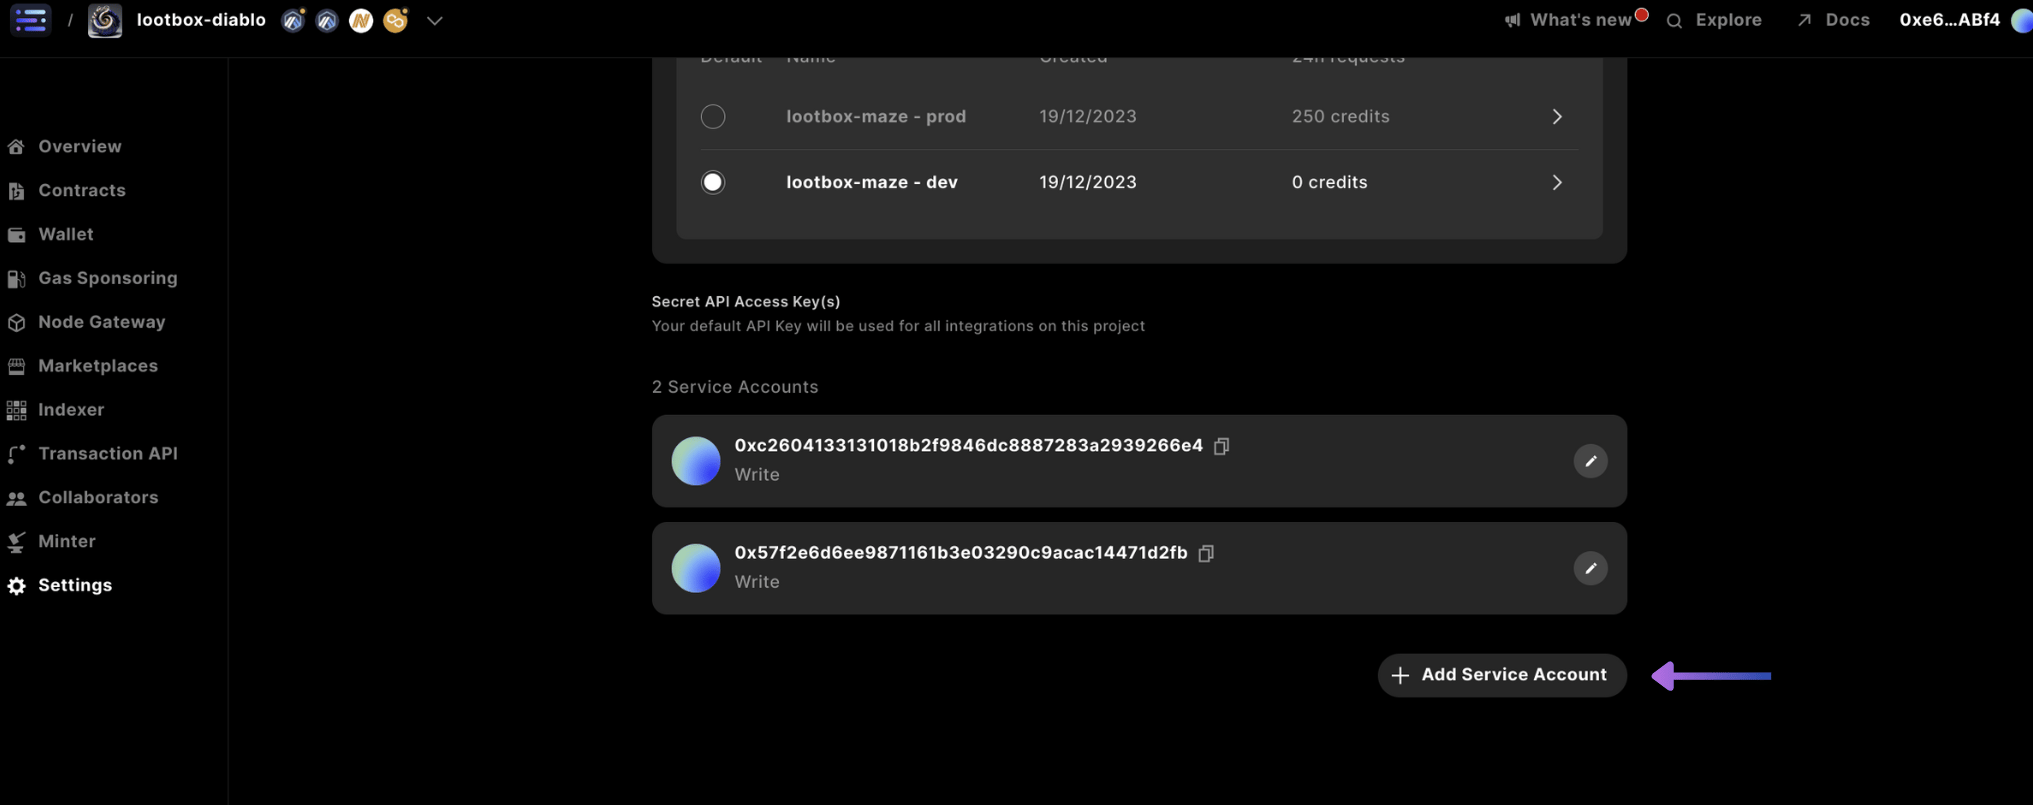
 下にスクロールして「+ Add Admin API Secret Key」を選択してください
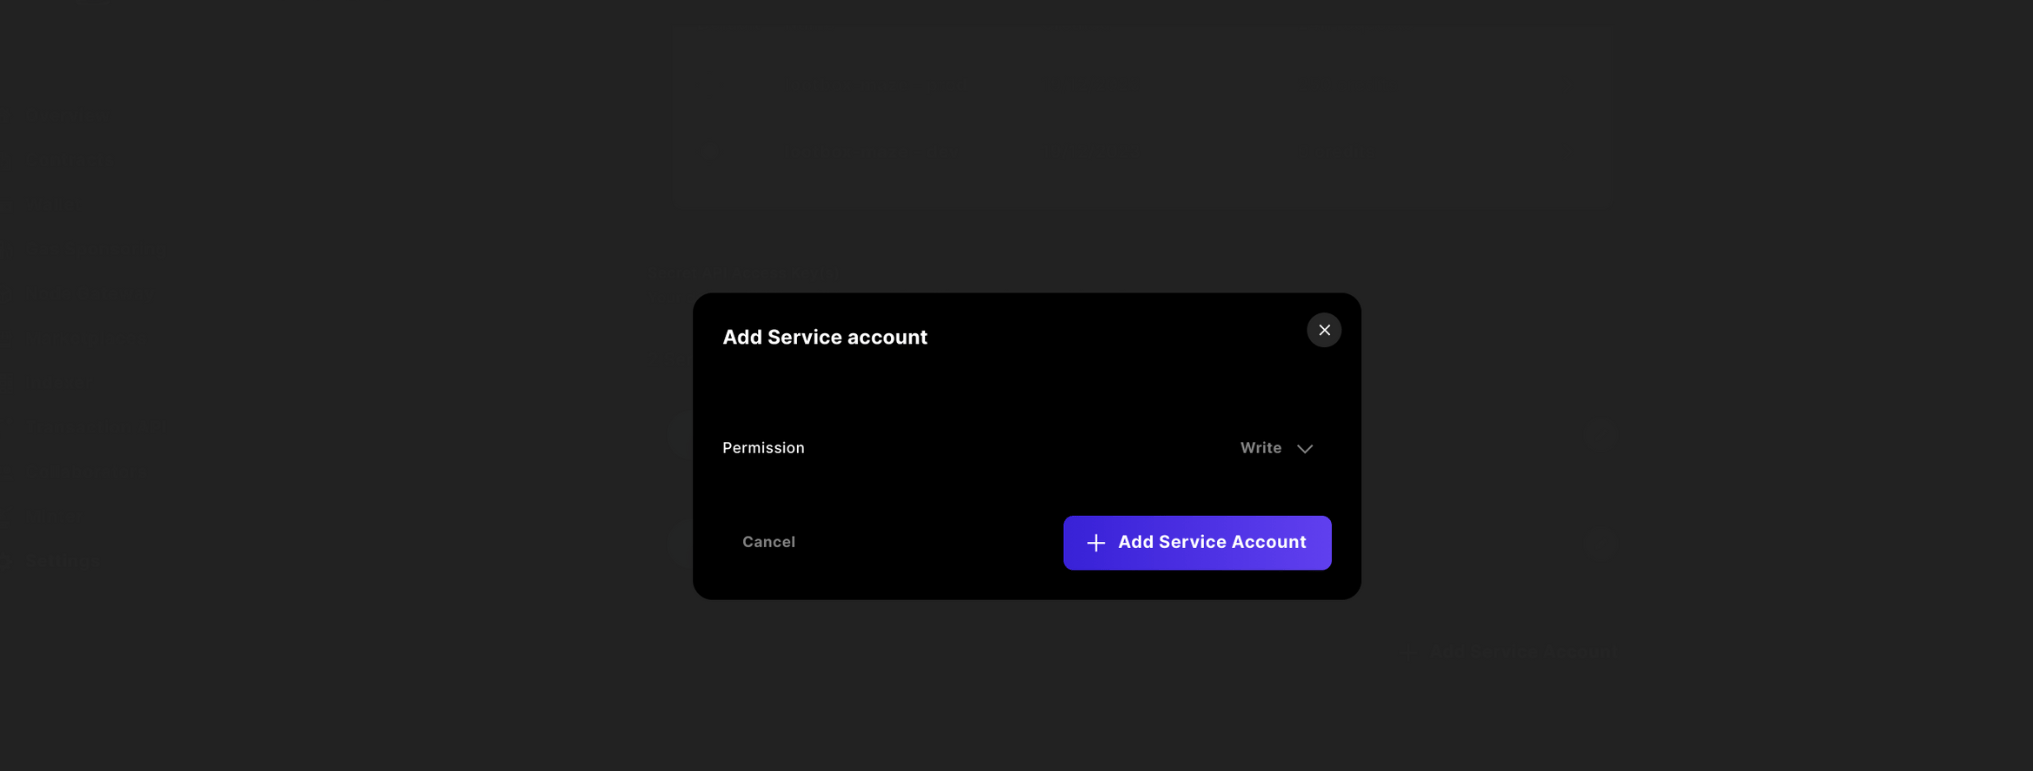
 アクセス権を「write」に変更し、「+ Add API Secret Key」を押して確定します
 最後にキーをコピーし、`wrangler.toml` の `JWT_ACCESS_KEY` として保存してください。今後は Sequence Builder コンソールからこのキーにアクセスできなくなります。
## 2. cURLリクエストからコレクションを作成する
サービスにメディアをアップロードするためには、最初にコレクションを作成する必要があります。[Builder Console](https://sequence.build/) から取得した `Secret API Key` と `projectID` を使用します。
サービスにリクエストを送り、`collectionID` を取得します。
```shell theme={null}
curl --location 'https://metadata.sequence.app/rpc/Collections/CreateCollection' \
--header 'Content-Type: application/json' \
--header 'Authorization: Bearer ' \
--data '{
"projectId": ,
"collection": {
"metadata": {
"name": "",
"description": "",
"external_link" : ""
},
"image": "",
"decimals": ,
"properties": null,
"attributes": null
}
}'
```
レスポンスで返された `collectionID` を `wrangler.toml` の `COLLECTION_ID` に設定します。
## 3. TokenID を使ってトークンを作成する
Cloudflare Worker を利用する場合は、`wrangler.toml` に `node_compat = true` を追加し、`@0xsequence/metadata` パッケージで window オブジェクトを利用可能にします。
`SequenceCollections` を利用するために、`pnpm install @0xsequence/metadata` で metadata パッケージをインストールします。
```typescript theme={null}
import { SequenceCollections } from '@0xsequence/metadata'
import { ethers } from 'ethers'
...
const METADATA_URL = 'https://metadata.sequence.app'
const collectionsService = new SequenceCollections(METADATA_URL, JWT_ACCESS_KEY)
const randomTokenIDSpace = ethers.BigNumber.from(ethers.hexlify(ethers.randomBytes(20)))
const res1 = await collectionsService.createToken({
projectId: projectID,
collectionId: collectionID,
token: {
tokenId: String(randomTokenIDSpace),
name: name,
description: description,
decimals: 0,
attributes: attributes // can leave blank
}
})
```
## 4. TokenID を使ってアセットを作成する
リクエストで `metadataField`(assetType)を `image` に設定し、必要な他のフィールドも入力して、次のステップで使用するアセットレスポンスを取得します。
```typescript theme={null}
const jsonCreateAsset = await collectionsService.createAsset({
projectId: projectID,
asset: {
id: Number(String(randomTokenIDSpace).slice(0,10)),
collectionId: collectionID,
tokenId: String(randomTokenIDSpace),
metadataField: "image"
}
})
```
## 5. 画像アセットを保存する
前の `jsonCreateAsset` オブジェクトから渡された `asset.id` を使用します。
```typescript theme={null}
...
const uploadAsset = async (env: Env, projectID: any, collectionID: any, assetID: any, tokenID: any, url: any) => {
const response = await fetch(url);
if (!response.ok) throw new Error(`Failed to fetch file from ${url}: ${response.statusText}`);
const arrayBuffer = await response.arrayBuffer();
const blob = new Blob([arrayBuffer]);
const formData = new FormData();
formData.append('file', blob);
let METADATA_URL = 'https://metadata.sequence.app'
// Construct the endpoint URL
const endpointURL = `${METADATA_URL}/projects/${projectID}/collections/${collectionID}/tokens/${tokenID}/upload/${assetID}`;
try {
// Use fetch to make the request
const fetchResponse = await fetch(endpointURL, {
method: 'PUT',
body: formData,
headers: {
Authorization: `Bearer ${env.JWT_ACCESS_KEY}`, // Put your token here
},
});
// Assuming the response is JSON
const data = await fetchResponse.json();
return data;
}catch(err){
console.log(err)
}
}
...
const uploadAssetRes = await uploadAsset(env, projectID, collectionID, jsonCreateAsset.asset.id, String(randomTokenIDSpace), imageUrl)
...
```
返された `uploadAssetRes.url` が Sequence サーバー上のメディアファイルの URL です。
## 6. 非プライベートトークンを更新する
次に、`private` ブール値を `false` に設定してトークンを非プライベートにします。
```typescript theme={null}
const res3 = await collectionsService.updateToken({
projectId: projectID,
collectionId: collectionID,
private: false,
tokenId: String(randomTokenIDSpace),
token: {
name: name,
attributes: attributes,
tokenId: String(randomTokenIDSpace),
}
})
```
***
## 7. cURLリクエストからコレクションを公開する
最後に、これも一度だけのリクエストとして、`projectID` と `collectionID` をもとに以下のコマンドを実行してコレクションを公開します。
```shell theme={null}
curl --location 'https://metadata.sequence.app/rpc/Collections/PublishCollection' \
--header 'Content-Type: application/json' \
--header 'Authorization: Bearer \
--data '{
"projectId": ,
"collectionId":
}'
```
これにより、コレクション内でprivateフラグが `false` に設定されたすべてのトークンが公開され、その他のトークンは変更されるまで非表示のままになります。
## 8. APIからアセットを公開レンダリングする
これまでの作業をテストするには、変数を更新した上でこの cURL リクエストを実行し、ファイルをローカル端末にダウンロードできます。
または、ブラウザに貼り付けて画像を確認することもできます。
同じコードを使用した場合、`` は `image.png` になります。
```shell [cURL] theme={null}
curl --location 'https://metadata.sequence.app/projects//collections//tokens//' --output stored_file.png
```
また、コレクションを `ERC721` や `ERC1155` の `baseURI` に使用する場合は、スマートコントラクトの `setBaseMetadataURI` に以下の `URI` を書き込みます。
```
https://metadata.sequence.app/projects//collections//tokens/
```
スマートコントラクトは自動的に `tokenID` を末尾に付加します。
お試しください。
```shell [cURL] theme={null}
curl https://metadata.sequence.app/projects/1229/collections/40/tokens/457657099779485875855215293997335918990635014431
```
または [ブラウザで確認](https://metadata.sequence.app/projects/1229/collections/40/tokens/457657099779485875855215293997335918990635014431)
### API からアセットをプライベートにレンダリングする
資産を非公開(tokenパラメータでprivate: true)にした場合でも、ヘッダーにjwt\_access\_keyを指定すればトークン画像を表示できます。
このガイドでは、`metadata_field` は `image` に設定されています
```shell [cURL] theme={null}
curl --location 'https://metadata.sequence.app/projects//collections//tokens//asset/' \
--header 'Authorization: Bearer ' \
--output stored_file.png
```
このガイドの全コードは [こちら](https://github.com/0xsequence-demos/template-cloudflare-worker-collections-api/tree/master) でご覧いただけます。
最後にキーをコピーし、`wrangler.toml` の `JWT_ACCESS_KEY` として保存してください。今後は Sequence Builder コンソールからこのキーにアクセスできなくなります。
## 2. cURLリクエストからコレクションを作成する
サービスにメディアをアップロードするためには、最初にコレクションを作成する必要があります。[Builder Console](https://sequence.build/) から取得した `Secret API Key` と `projectID` を使用します。
サービスにリクエストを送り、`collectionID` を取得します。
```shell theme={null}
curl --location 'https://metadata.sequence.app/rpc/Collections/CreateCollection' \
--header 'Content-Type: application/json' \
--header 'Authorization: Bearer ' \
--data '{
"projectId": ,
"collection": {
"metadata": {
"name": "",
"description": "",
"external_link" : ""
},
"image": "",
"decimals": ,
"properties": null,
"attributes": null
}
}'
```
レスポンスで返された `collectionID` を `wrangler.toml` の `COLLECTION_ID` に設定します。
## 3. TokenID を使ってトークンを作成する
Cloudflare Worker を利用する場合は、`wrangler.toml` に `node_compat = true` を追加し、`@0xsequence/metadata` パッケージで window オブジェクトを利用可能にします。
`SequenceCollections` を利用するために、`pnpm install @0xsequence/metadata` で metadata パッケージをインストールします。
```typescript theme={null}
import { SequenceCollections } from '@0xsequence/metadata'
import { ethers } from 'ethers'
...
const METADATA_URL = 'https://metadata.sequence.app'
const collectionsService = new SequenceCollections(METADATA_URL, JWT_ACCESS_KEY)
const randomTokenIDSpace = ethers.BigNumber.from(ethers.hexlify(ethers.randomBytes(20)))
const res1 = await collectionsService.createToken({
projectId: projectID,
collectionId: collectionID,
token: {
tokenId: String(randomTokenIDSpace),
name: name,
description: description,
decimals: 0,
attributes: attributes // can leave blank
}
})
```
## 4. TokenID を使ってアセットを作成する
リクエストで `metadataField`(assetType)を `image` に設定し、必要な他のフィールドも入力して、次のステップで使用するアセットレスポンスを取得します。
```typescript theme={null}
const jsonCreateAsset = await collectionsService.createAsset({
projectId: projectID,
asset: {
id: Number(String(randomTokenIDSpace).slice(0,10)),
collectionId: collectionID,
tokenId: String(randomTokenIDSpace),
metadataField: "image"
}
})
```
## 5. 画像アセットを保存する
前の `jsonCreateAsset` オブジェクトから渡された `asset.id` を使用します。
```typescript theme={null}
...
const uploadAsset = async (env: Env, projectID: any, collectionID: any, assetID: any, tokenID: any, url: any) => {
const response = await fetch(url);
if (!response.ok) throw new Error(`Failed to fetch file from ${url}: ${response.statusText}`);
const arrayBuffer = await response.arrayBuffer();
const blob = new Blob([arrayBuffer]);
const formData = new FormData();
formData.append('file', blob);
let METADATA_URL = 'https://metadata.sequence.app'
// Construct the endpoint URL
const endpointURL = `${METADATA_URL}/projects/${projectID}/collections/${collectionID}/tokens/${tokenID}/upload/${assetID}`;
try {
// Use fetch to make the request
const fetchResponse = await fetch(endpointURL, {
method: 'PUT',
body: formData,
headers: {
Authorization: `Bearer ${env.JWT_ACCESS_KEY}`, // Put your token here
},
});
// Assuming the response is JSON
const data = await fetchResponse.json();
return data;
}catch(err){
console.log(err)
}
}
...
const uploadAssetRes = await uploadAsset(env, projectID, collectionID, jsonCreateAsset.asset.id, String(randomTokenIDSpace), imageUrl)
...
```
返された `uploadAssetRes.url` が Sequence サーバー上のメディアファイルの URL です。
## 6. 非プライベートトークンを更新する
次に、`private` ブール値を `false` に設定してトークンを非プライベートにします。
```typescript theme={null}
const res3 = await collectionsService.updateToken({
projectId: projectID,
collectionId: collectionID,
private: false,
tokenId: String(randomTokenIDSpace),
token: {
name: name,
attributes: attributes,
tokenId: String(randomTokenIDSpace),
}
})
```
***
## 7. cURLリクエストからコレクションを公開する
最後に、これも一度だけのリクエストとして、`projectID` と `collectionID` をもとに以下のコマンドを実行してコレクションを公開します。
```shell theme={null}
curl --location 'https://metadata.sequence.app/rpc/Collections/PublishCollection' \
--header 'Content-Type: application/json' \
--header 'Authorization: Bearer \
--data '{
"projectId": ,
"collectionId":
}'
```
これにより、コレクション内でprivateフラグが `false` に設定されたすべてのトークンが公開され、その他のトークンは変更されるまで非表示のままになります。
## 8. APIからアセットを公開レンダリングする
これまでの作業をテストするには、変数を更新した上でこの cURL リクエストを実行し、ファイルをローカル端末にダウンロードできます。
または、ブラウザに貼り付けて画像を確認することもできます。
同じコードを使用した場合、`` は `image.png` になります。
```shell [cURL] theme={null}
curl --location 'https://metadata.sequence.app/projects//collections//tokens//' --output stored_file.png
```
また、コレクションを `ERC721` や `ERC1155` の `baseURI` に使用する場合は、スマートコントラクトの `setBaseMetadataURI` に以下の `URI` を書き込みます。
```
https://metadata.sequence.app/projects//collections//tokens/
```
スマートコントラクトは自動的に `tokenID` を末尾に付加します。
お試しください。
```shell [cURL] theme={null}
curl https://metadata.sequence.app/projects/1229/collections/40/tokens/457657099779485875855215293997335918990635014431
```
または [ブラウザで確認](https://metadata.sequence.app/projects/1229/collections/40/tokens/457657099779485875855215293997335918990635014431)
### API からアセットをプライベートにレンダリングする
資産を非公開(tokenパラメータでprivate: true)にした場合でも、ヘッダーにjwt\_access\_keyを指定すればトークン画像を表示できます。
このガイドでは、`metadata_field` は `image` に設定されています
```shell [cURL] theme={null}
curl --location 'https://metadata.sequence.app/projects//collections//tokens//asset/' \
--header 'Authorization: Bearer ' \
--output stored_file.png
```
このガイドの全コードは [こちら](https://github.com/0xsequence-demos/template-cloudflare-worker-collections-api/tree/master) でご覧いただけます。