> ## Documentation Index
> Fetch the complete documentation index at: https://sequence-0fb8d9e6-codex-update-discord-invite.mintlify.site/llms.txt
> Use this file to discover all available pages before exploring further.
# DuneのSequence Analytics API
> このガイドでは、Sequence Builderのアナリティクス機能を使い、サーバーレスなCloudflare Workerを利用してプロジェクトのユーザーデータをクエリする方法をご紹介します。
所要時間:20〜30分
本ガイドでは、[Sequence Builder](https://sequence.build/)のアナリティクス機能を活用し、サーバーレスな[Cloudflare Worker](https://www.cloudflare.com/)を使って、特定プロジェクトのユーザー利用状況をクエリする方法を解説します。
コミュニティに成果を示すために、[Dune](https://dune.com/)のダッシュボードで状況を公開できます。また、生成したAPIを利用し、ユーザー分析に基づくインテリジェントなフィードバックループをゲームに組み込むこともできます。
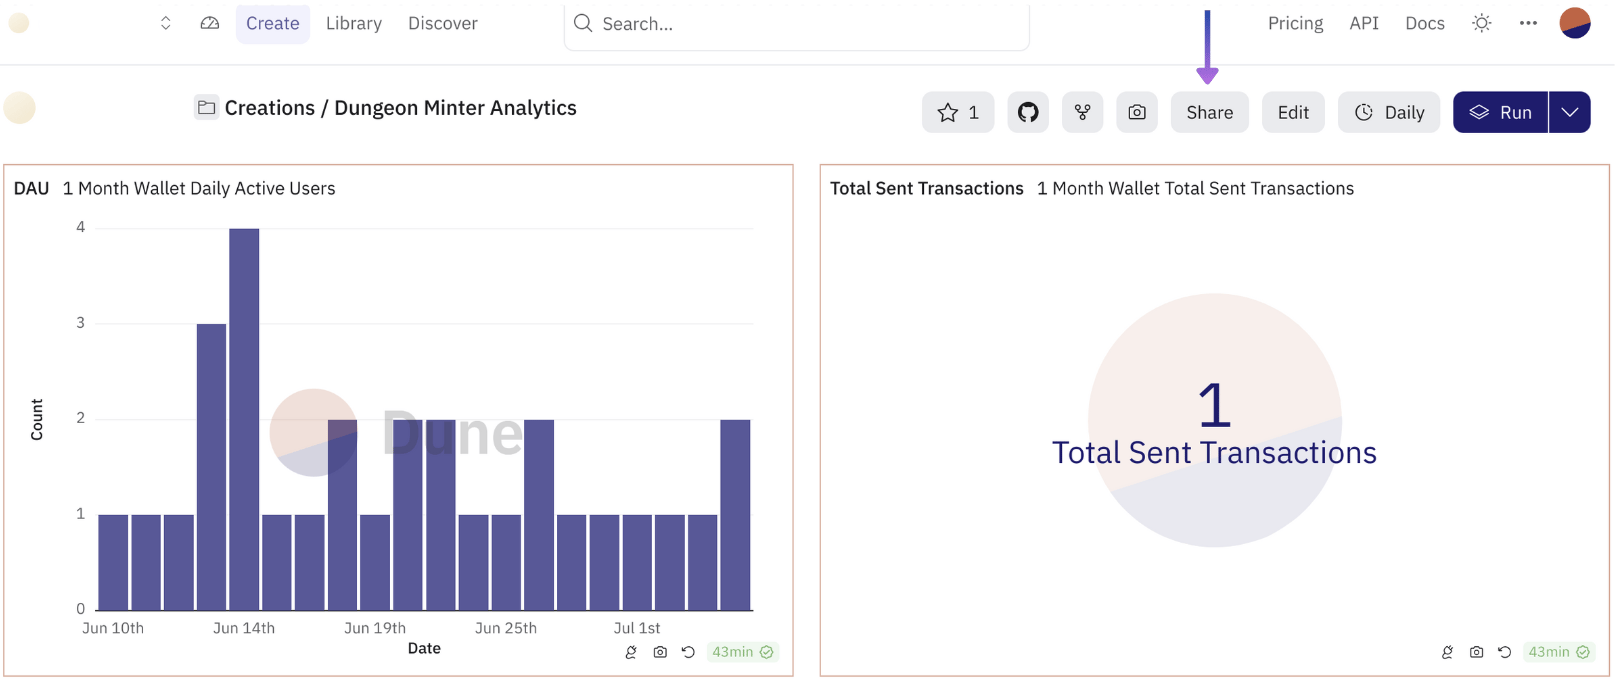
このガイドの出力例は[こちら](https://dune.com/mmhorizon/dungeon-minter-analytics)で確認できます。
1. アクセスキー管理:Sequenceスタックと連携するためのシークレットアクセスキーを取得
2. Cloudflare Worker:Sequenceスタックにクエリし、プロジェクト固有のデータポイントを生成する関数を作成
3. Duneダッシュボード:データを可視化し、共有可能なダッシュボードを作成
テンプレートコードの参考例は
[こちら](https://github.com/0xsequence-demos/template-cloudflare-worker-wallets-analytics)をご覧ください。
## 1. アクセスキー管理
プロジェクトのアプリケーションをSequenceスタックで認証するために、シークレットアクセスキーを取得する必要があります。以下の手順に従ってください。
### シークレットアクセスキーの作成
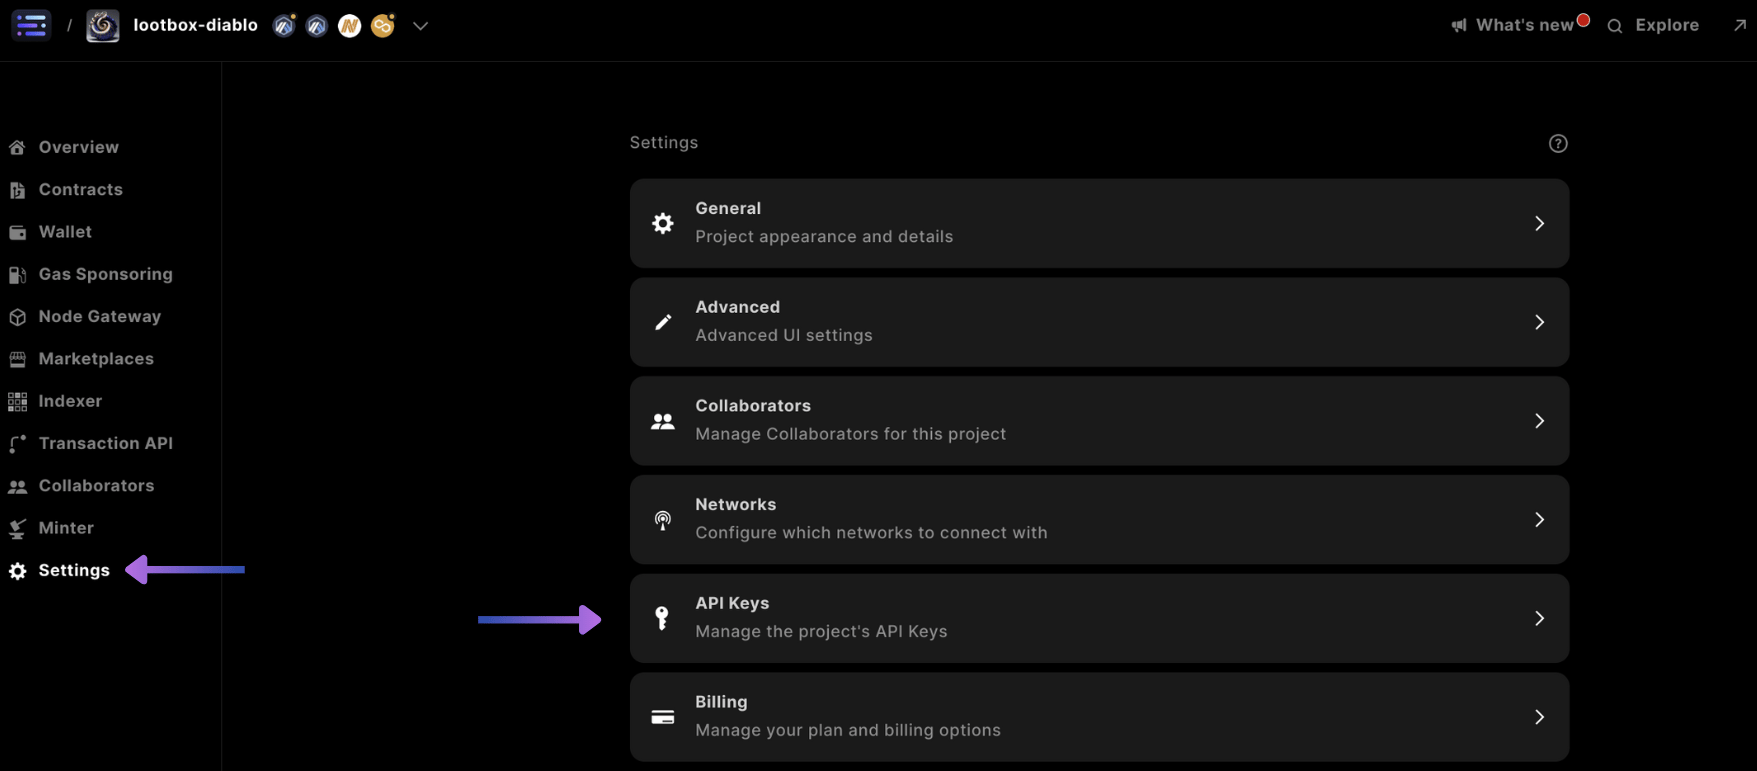
まず設定画面を開き、「API Keys」カードを選択します。
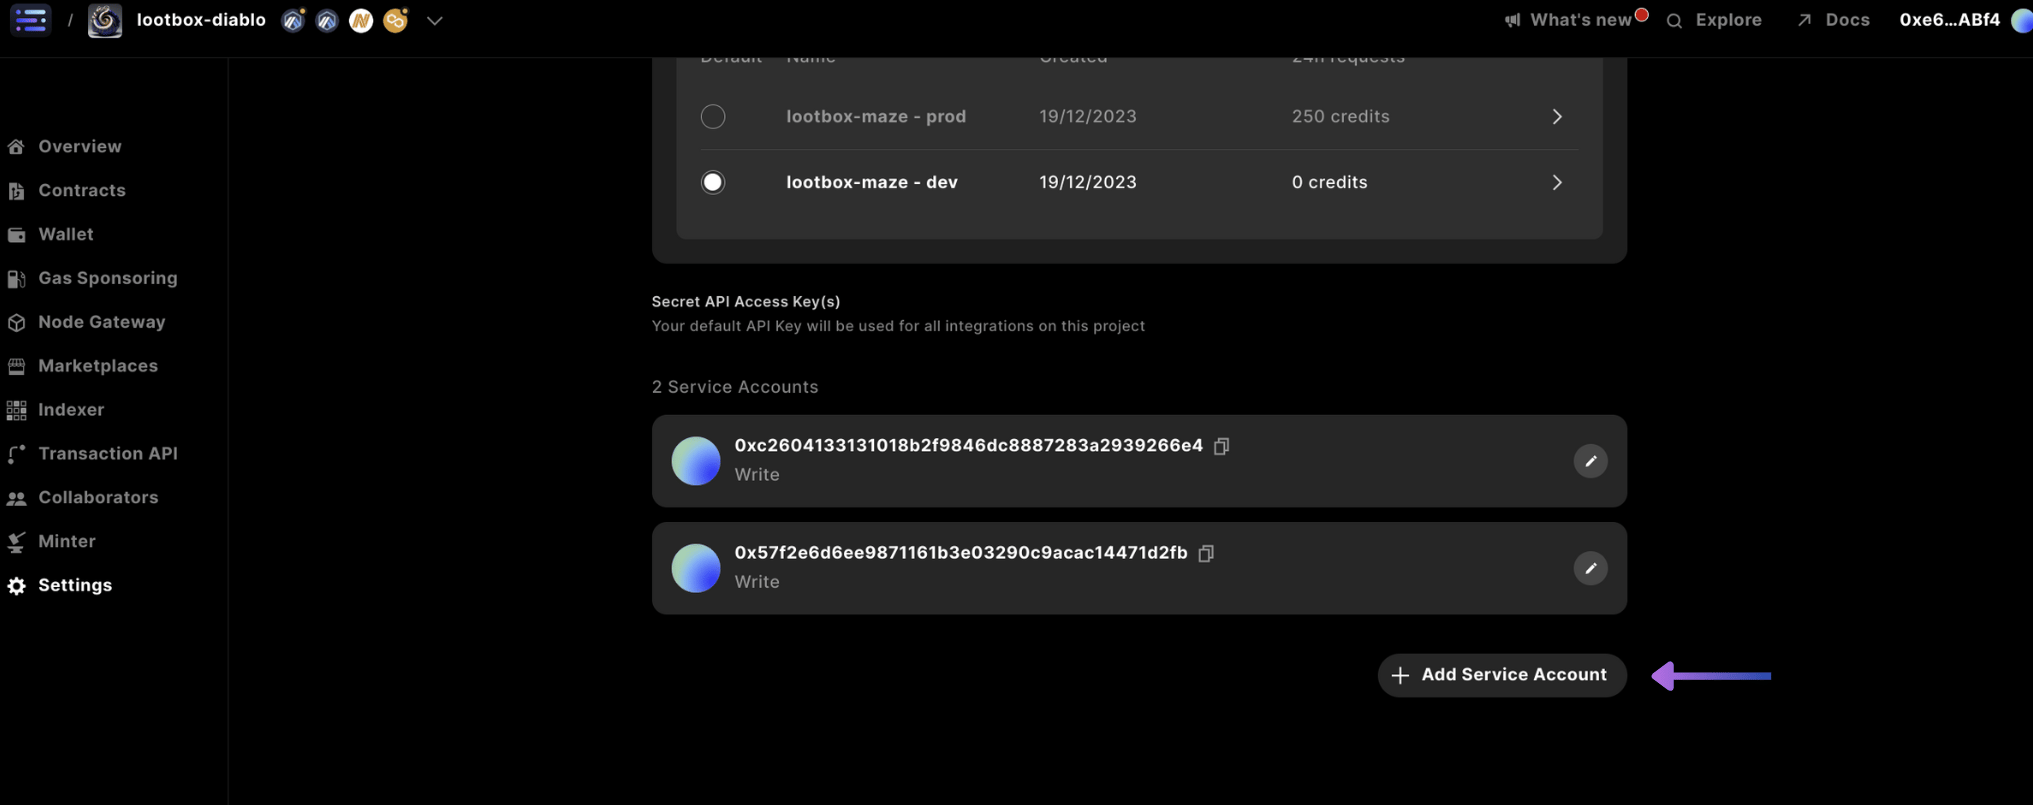
 画面を下にスクロールし、`+ Add Service Account`を選択します。
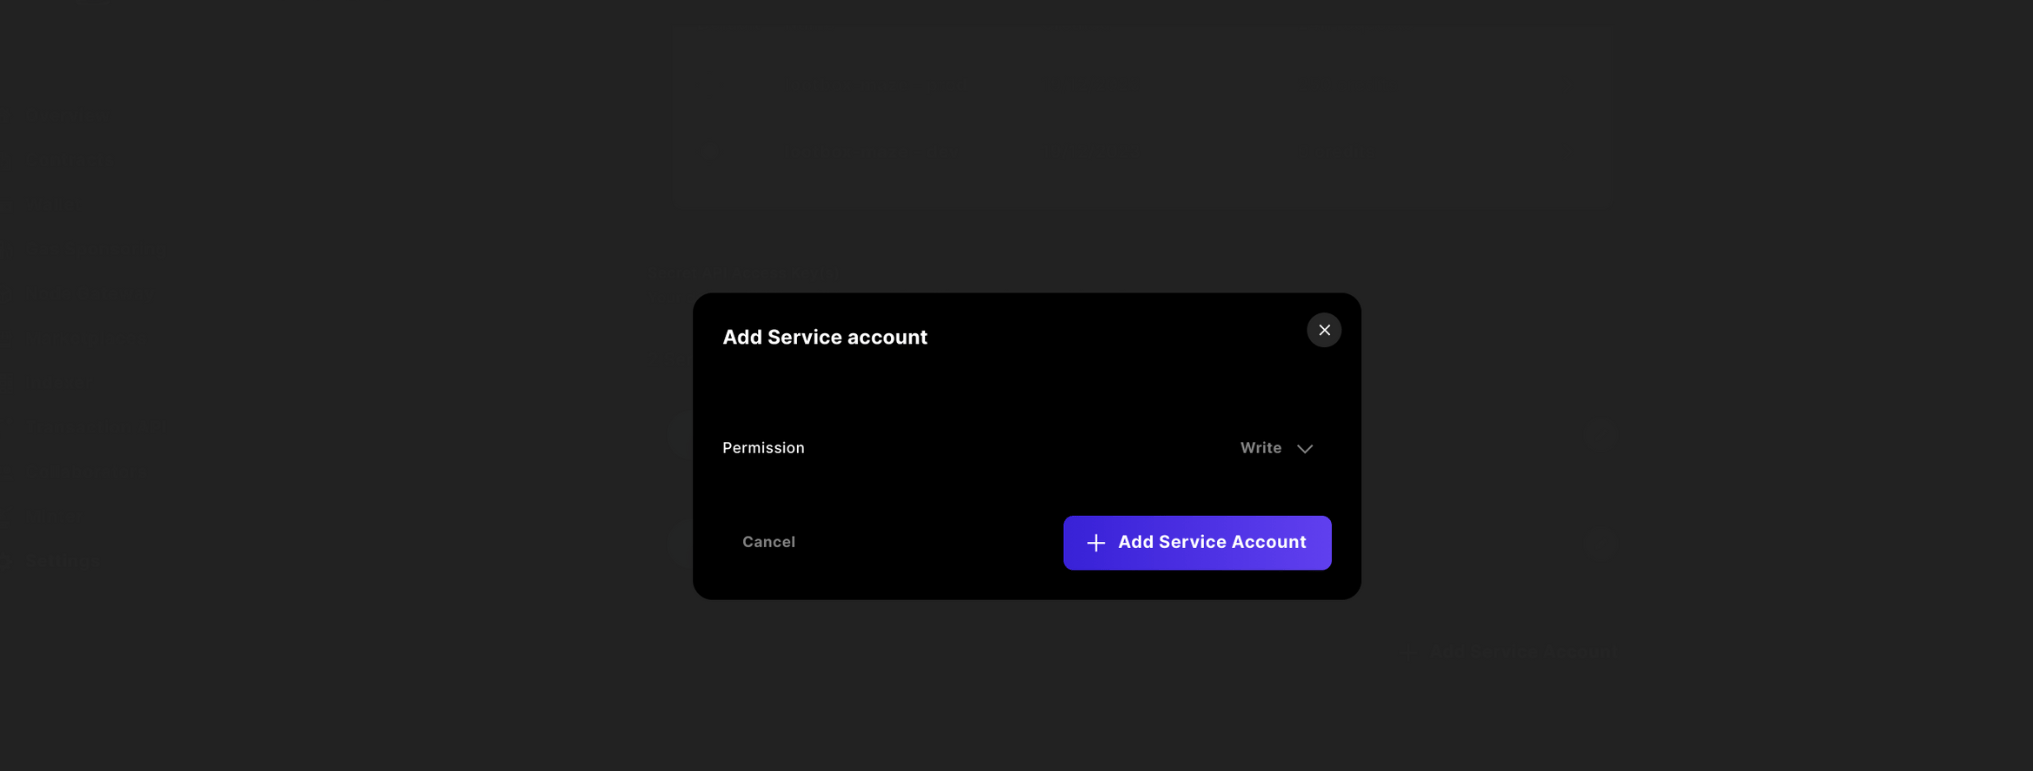
 次に権限を`Write`に変更し、`+ Add Service Account`をクリックしてから`Confirm`を選択します。
 最後にキーを`コピー`し、安全な場所に保管してください。このキーは後からSequence Builderで再取得できないため、安全な場所に保管してください。
## 2. Cloudflare Worker
この例では、Cloudflare Workerを使うことでダッシュボード利用に応じた自動スケーリングやCLIからの簡単なデプロイが可能ですが、ご自身のバックエンドや他のサーバーレスサービスもご利用いただけます。
まず、`mkdir`でディレクトリを作成し、`cd`でそのディレクトリに移動し、`pnpm init`で`package.json`を作成します。
プロジェクトにwrangler CLIがインストールされていることを確認し、ローカルのbashセッションで`wrangler`キーワードをエイリアスとして設定してください。
```shell theme={null}
pnpm install wrangler --save-dev
alias wrangler='./node_modules/.bin/wrangler'
```
[Cloudflareサイト](https://cloudflare.com/)でアカウントを作成し、ログインしてCloudflareダッシュボードにアクセスし、Cloudflareプラットフォームをローカル開発環境と接続します。
```shell theme={null}
wrangler login
```
ログイン後、ディレクトリで`wrangler init`コマンドを実行し、好みのランダムなプロジェクトフォルダ名を選択してプロンプトに従い、git管理されたTypeScriptの「Hello World」Workerアプリケーションを初期化します。
```shell theme={null}
wrangler init
```
このステップを完了するには、`wrangler init`後にエンターを4回押し、最後の2つの質問には`No`と答えてgitバージョン管理とデプロイをスキップしてください。
これにより、クラウドにコードをデプロイできるスターターリポジトリがクローンされます。
ローカルAPIテスト
最後にキーを`コピー`し、安全な場所に保管してください。このキーは後からSequence Builderで再取得できないため、安全な場所に保管してください。
## 2. Cloudflare Worker
この例では、Cloudflare Workerを使うことでダッシュボード利用に応じた自動スケーリングやCLIからの簡単なデプロイが可能ですが、ご自身のバックエンドや他のサーバーレスサービスもご利用いただけます。
まず、`mkdir`でディレクトリを作成し、`cd`でそのディレクトリに移動し、`pnpm init`で`package.json`を作成します。
プロジェクトにwrangler CLIがインストールされていることを確認し、ローカルのbashセッションで`wrangler`キーワードをエイリアスとして設定してください。
```shell theme={null}
pnpm install wrangler --save-dev
alias wrangler='./node_modules/.bin/wrangler'
```
[Cloudflareサイト](https://cloudflare.com/)でアカウントを作成し、ログインしてCloudflareダッシュボードにアクセスし、Cloudflareプラットフォームをローカル開発環境と接続します。
```shell theme={null}
wrangler login
```
ログイン後、ディレクトリで`wrangler init`コマンドを実行し、好みのランダムなプロジェクトフォルダ名を選択してプロンプトに従い、git管理されたTypeScriptの「Hello World」Workerアプリケーションを初期化します。
```shell theme={null}
wrangler init
```
このステップを完了するには、`wrangler init`後にエンターを4回押し、最後の2つの質問には`No`と答えてgitバージョン管理とデプロイをスキップしてください。
これにより、クラウドにコードをデプロイできるスターターリポジトリがクローンされます。
ローカルAPIテスト
ガイドの任意のタイミングで、プロジェクトフォルダ内で`wrangler dev`コマンドを使いローカルテストが可能です。
#### デプロイテスト
最後に、ランダムに生成されたプロジェクトフォルダに`cd`で移動し、`wrangler deploy`コマンドを実行します。
これによりURLが表示されるので、ブラウザで`https://..workers.dev`にアクセスし、「Hello World!」の結果を確認できます。
プロジェクトのセットアップが完了したら、`wrangler.toml`に以下の変数を追加します。ここで、`DAYS`は分析対象となる期間(日数)を指定します。
```shell theme={null}
[vars]
SECRET_API_ACCESS_KEY = ""
PROJECT_ID =
DAYS =
```
次に、`index.ts`に変数を含めた`Env`型を追加します。
```ts theme={null}
export interface Env {
PROJECT_ID: number;
SECRET_API_ACCESS_KEY: string;
DAYS: number;
}
```
既存の`fetch`関数を、以下のモック関数呼び出しに置き換えます。
```ts theme={null}
export default {
async fetch(request: Request, env: Env, ctx: ExecutionContext): Promise {
const url = new URL(request.url);
// Handle different endpoints
if (url.pathname === "/dailyActiveUsers") {
return handleDailyWallets(env, request);
} else if (url.pathname === "/totalTransactionsSent") {
return handleTotalTxns(env, request);
} else {
return new Response("No function for this URL", {status: 405});
}
}
};
```
以下の関数を使用します。
```ts theme={null}
const handleDailyWallets = async (env: Env, request: Request) => {
return new Response(JSON.stringify({endpoint: "daily"}), {status: 200});
};
const handleTotalTxns = async (env: Env, request: Request) => {
return new Response(JSON.stringify({endpoint: "total"}), {status: 200});
};
```
次に、`wrangler.toml`の`DAYS`変数に設定された最新の値から正しい日付をパースするためのユーティリティ関数を追加します。
```ts theme={null}
const endDate = () => {
const today = new Date();
return today.toISOString().substring(0, 10); // only including the YYYY-MM-DD date
};
const startDate = (env: Env) => {
const today = new Date();
// Format today's date as a string
const daysBefore = new Date(today);
daysBefore.setDate(daysBefore.getDate() - env.DAYS);
// Format the date 7 days before as a string by only including the YYYY-MM-DD date
const daysBeforeString = daysBefore.toISOString().substring(0, 10);
return daysBeforeString;
};
```
`Daily Active Users`リクエストは、以下の関数を使ってSequence Analytics APIを呼び出して処理します。
```ts theme={null}
const handleDailyWallets = async (env: Env, request: Request) => {
const resp = await fetch(`https://api.sequence.build/rpc/Analytics/WalletsDaily`, {
method: "POST",
headers: {
"Content-Type": "application/json",
Authorization: `Bearer ${env.SECRET_API_ACCESS_KEY}`
},
body: JSON.stringify({
filter: {
dateInterval: "DAY",
endDate: endDate(),
projectId: env.PROJECT_ID,
startDate: startDate(env)
}
})
});
const data: any = await resp.json();
return new Response(JSON.stringify(data.walletStats), {status: 200});
};
```
最後に、「送信されたトランザクション総数」用の以下の関数を追加します。
```ts theme={null}
const handleTotalTxns = async (env: Env, request: Request) => {
const resp = await fetch(
`https://api.sequence.build/rpc/Analytics/WalletsTxnSentTotal`,
{
method: "POST",
headers: {
"Content-Type": "application/json",
Authorization: `Bearer ${env.SECRET_API_ACCESS_KEY}`
},
body: JSON.stringify({
filter: {
dateInterval: "DAY",
endDate: endDate(),
projectId: env.PROJECT_ID,
startDate: startDate(env)
}
})
}
);
const data: any = await resp.json();
return new Response(JSON.stringify(data.walletStats), {status: 200});
};
```
Sequence Analytics APIのレスポンスには、アクティビティがゼロの日付は含まれていません。時系列の間隔を表示する場合は、以下の関数を使ってデータがない日付も正しいフォーマットで補完できます。
```typescript theme={null}
const fillMissingDates = (data: any[], startDate: string, endDate: string) => {
const filledData: {value: number; label: string}[] = [];
const start = new Date(startDate);
const end = new Date(endDate);
for (let d = new Date(start); d <= end; d.setDate(d.getDate() + 1)) {
const dateString = d.toISOString().substring(0, 10);
const existingData = data.find((entry) => entry.label === dateString);
if (existingData) {
filledData.push(existingData);
} else {
filledData.push({value: 0, label: dateString});
}
}
return filledData;
};
```
両方のレスポンスで、`walletStats`データを渡して以下の関数を呼び出してください。
```typescript theme={null}
...
const data: any = await resp.json();
const filledData = fillMissingDates(data.walletStats, startDate(env), endDate());
return new Response(JSON.stringify(filledData), { status: 200 });
}
```
`wrangler deploy`で再デプロイした後、ホスト名の後ろに`/dailyActiveUsers`や`/totalTransactionsSent`を付けてAPIエンドポイントにアクセスし、テストできます。
Analytics APIで利用可能な他のエンドポイント例については、[概要](/api-references/analytics/overview)ページを参照してください。
## 3. Duneダッシュボード
まず、[Dune](https://dune.com/)にサインアップします。
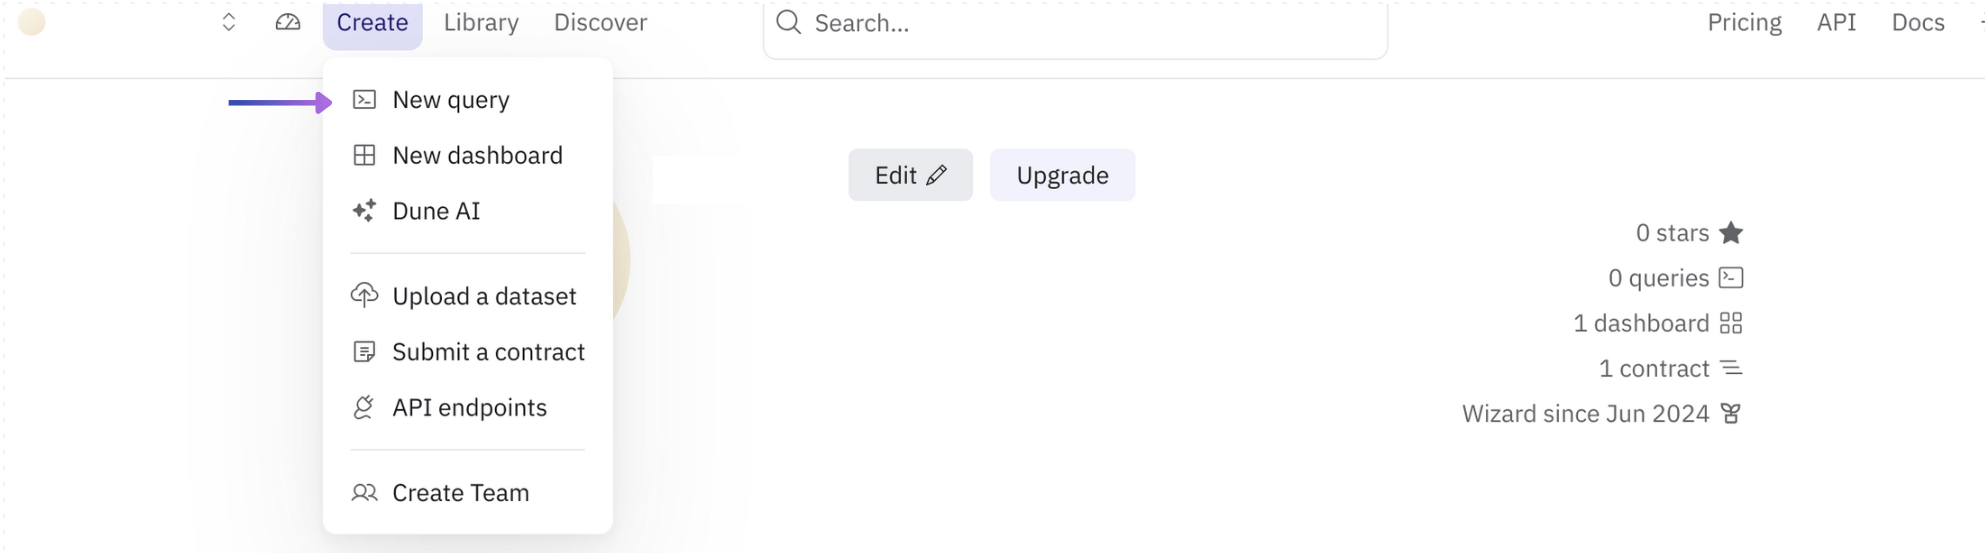
`https://dune.com/`にアクセスし、`Create`ボタンから`New query`を選択します。
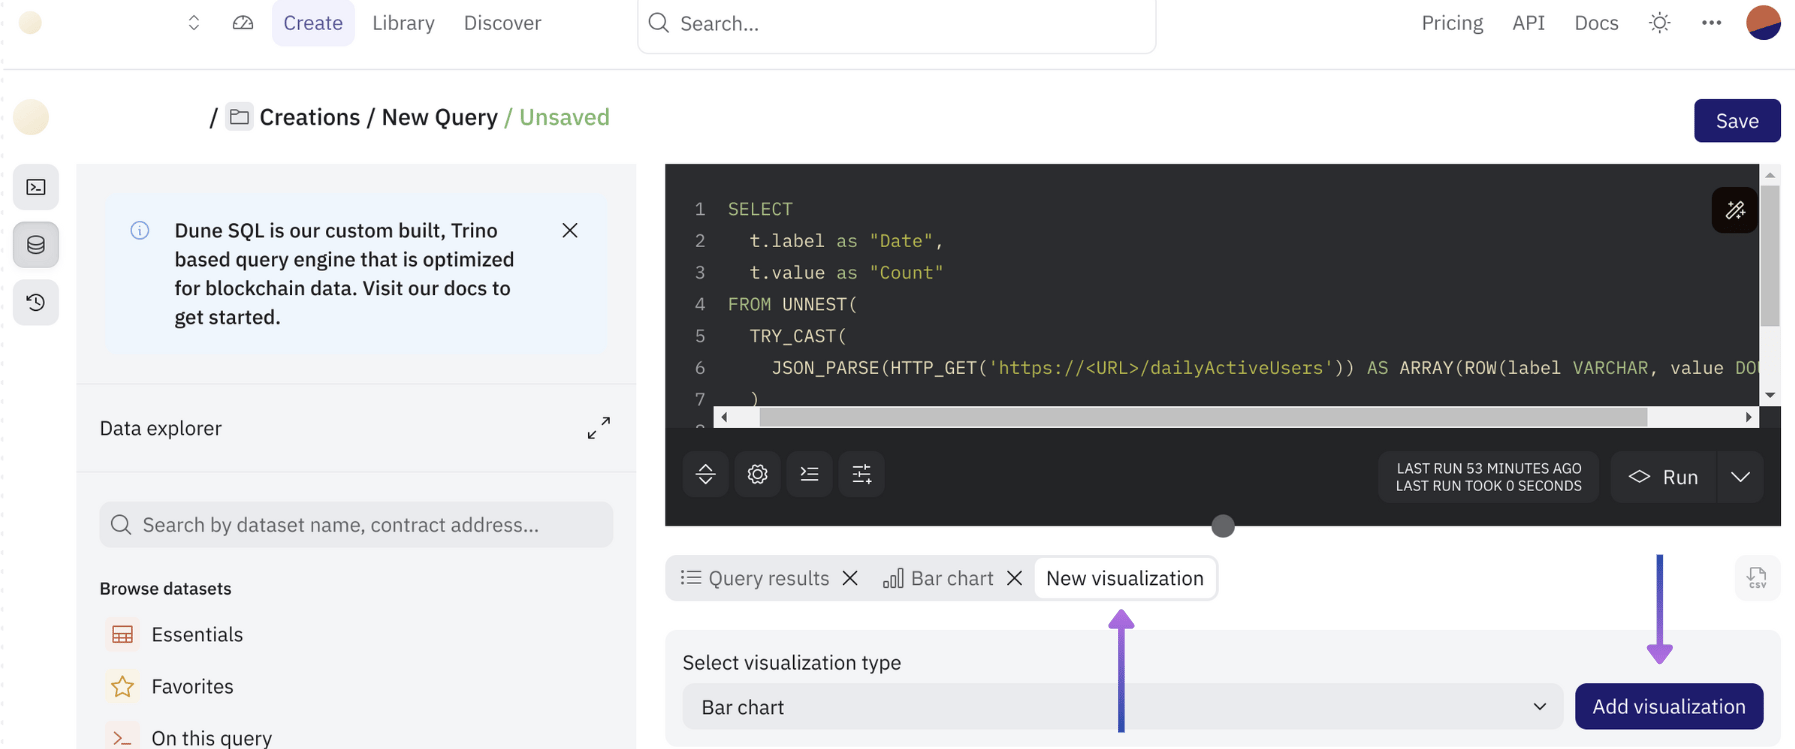
 以下のSQLクエリをコンソールに入力し、`Run`を選択します。
```sql theme={null}
SELECT
t.label as "Date", -- converting the label to "Date"
t.value as "Count" -- converting the value field to "Count"
FROM UNNEST(
TRY_CAST(
JSON_PARSE(HTTP_GET('https:///dailyActiveUsers')) AS ARRAY(ROW(label VARCHAR, value DOUBLE))
)
) AS t(label, value)
```
結果が返ってきたら、`New visualization`を作成します。
デフォルトで`Bar chart`が選択されている状態で`Add visualization`をクリックします(カスタマイズも可能です)。
以下のSQLクエリをコンソールに入力し、`Run`を選択します。
```sql theme={null}
SELECT
t.label as "Date", -- converting the label to "Date"
t.value as "Count" -- converting the value field to "Count"
FROM UNNEST(
TRY_CAST(
JSON_PARSE(HTTP_GET('https:///dailyActiveUsers')) AS ARRAY(ROW(label VARCHAR, value DOUBLE))
)
) AS t(label, value)
```
結果が返ってきたら、`New visualization`を作成します。
デフォルトで`Bar chart`が選択されている状態で`Add visualization`をクリックします(カスタマイズも可能です)。
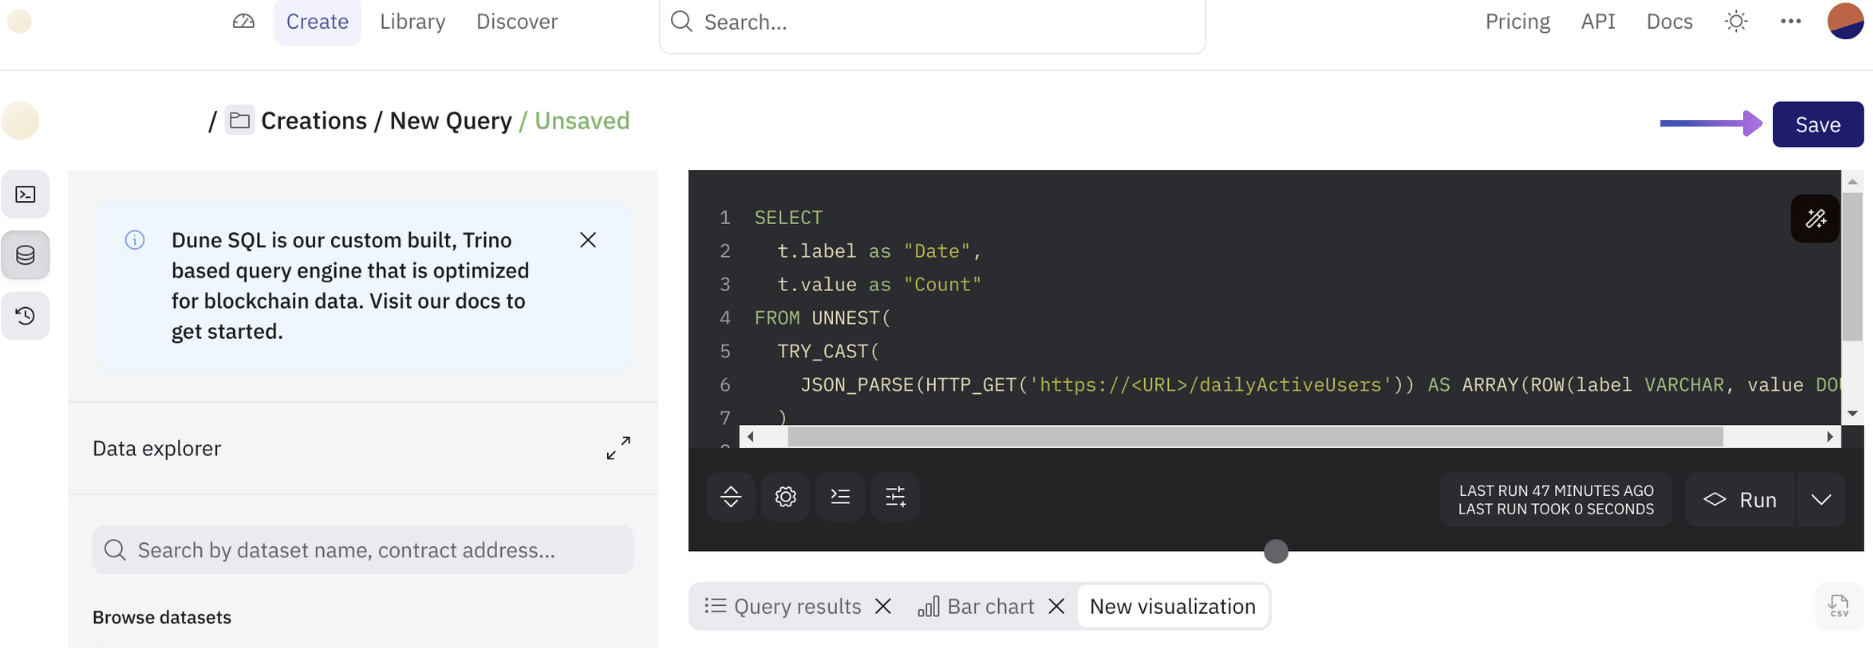
 最後に`Save`をクリックし、クエリに名前を付けます。
 [前の手順](/guides/analytics-guide#create-query)と同様に進め、以下のSQLクエリを使用します。
```sql theme={null}
SELECT
t.label,
t.value
FROM UNNEST(
TRY_CAST(
JSON_PARSE(HTTP_GET('https:///totalTransactionsSent')) AS ARRAY(ROW(label VARCHAR, value DOUBLE))
)
) AS t(label, value)
```
結果が返ってきたら、`New visualization`を作成します。
`Add visualization`を選択し、`Counter`までスクロールしてAPIから返された合計値を表示するカウンターウィジェットを作成します。
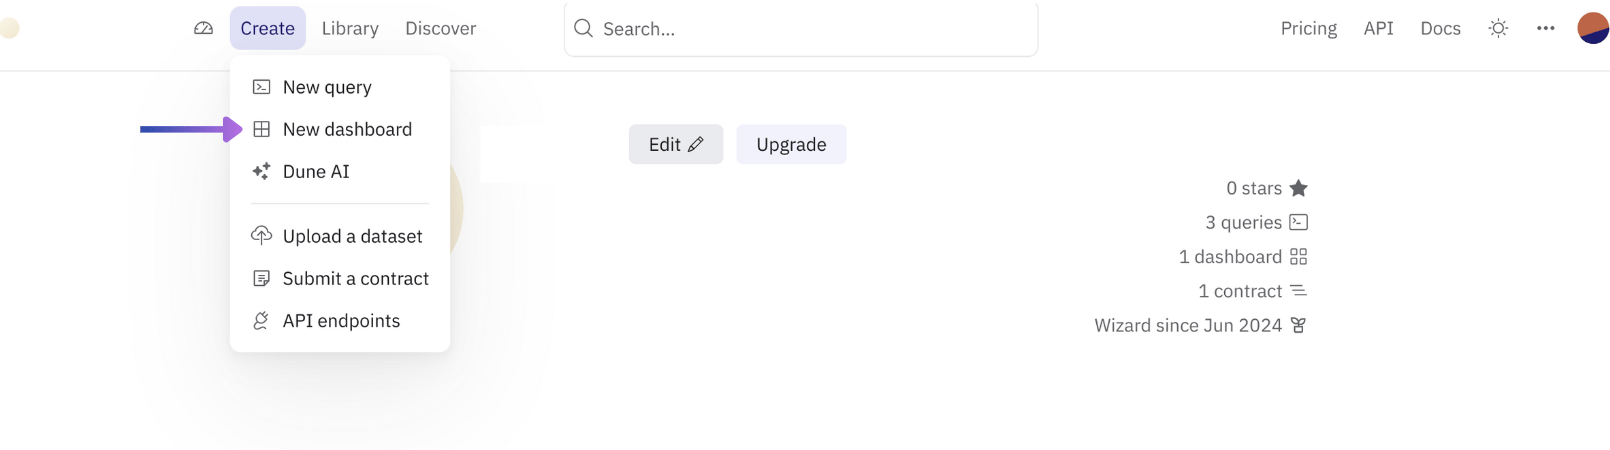
`Create` > `New dashboard`ボタンから新しいダッシュボード名を入力します。
[前の手順](/guides/analytics-guide#create-query)と同様に進め、以下のSQLクエリを使用します。
```sql theme={null}
SELECT
t.label,
t.value
FROM UNNEST(
TRY_CAST(
JSON_PARSE(HTTP_GET('https:///totalTransactionsSent')) AS ARRAY(ROW(label VARCHAR, value DOUBLE))
)
) AS t(label, value)
```
結果が返ってきたら、`New visualization`を作成します。
`Add visualization`を選択し、`Counter`までスクロールしてAPIから返された合計値を表示するカウンターウィジェットを作成します。
`Create` > `New dashboard`ボタンから新しいダッシュボード名を入力します。
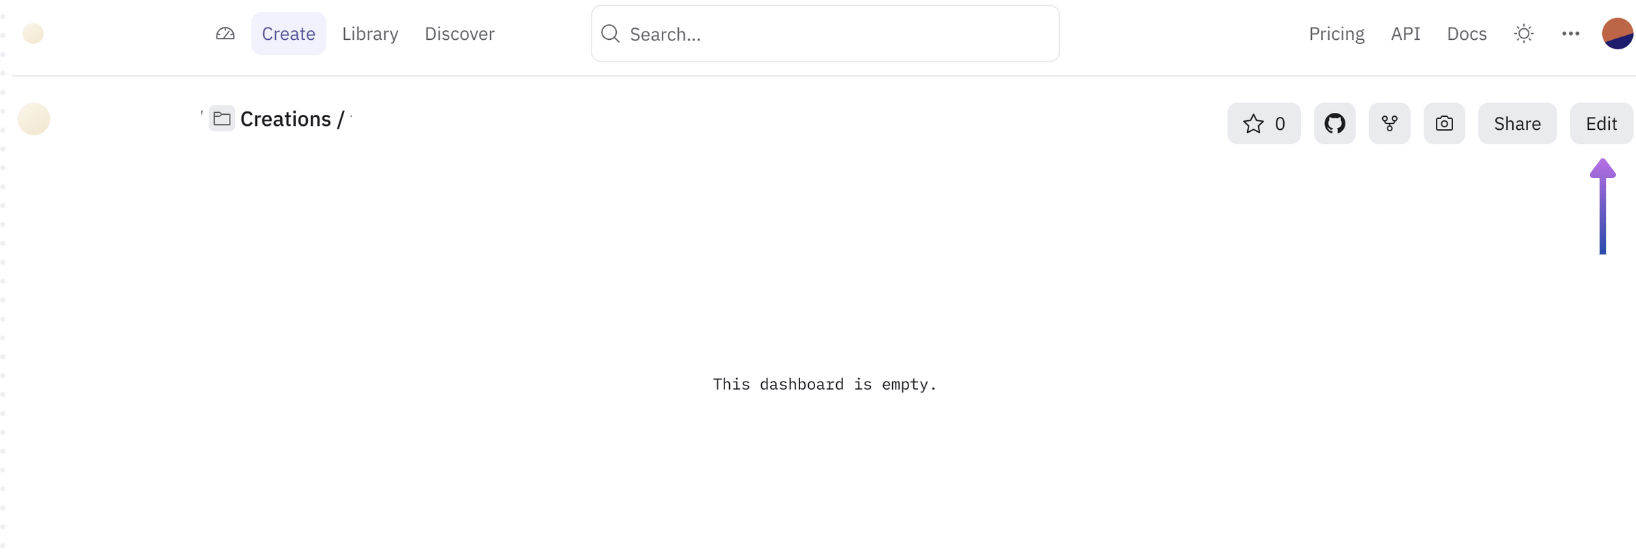
 作成後、`Edit`をクリックし、`Add visualization`から先ほどの2つのクエリを追加します。
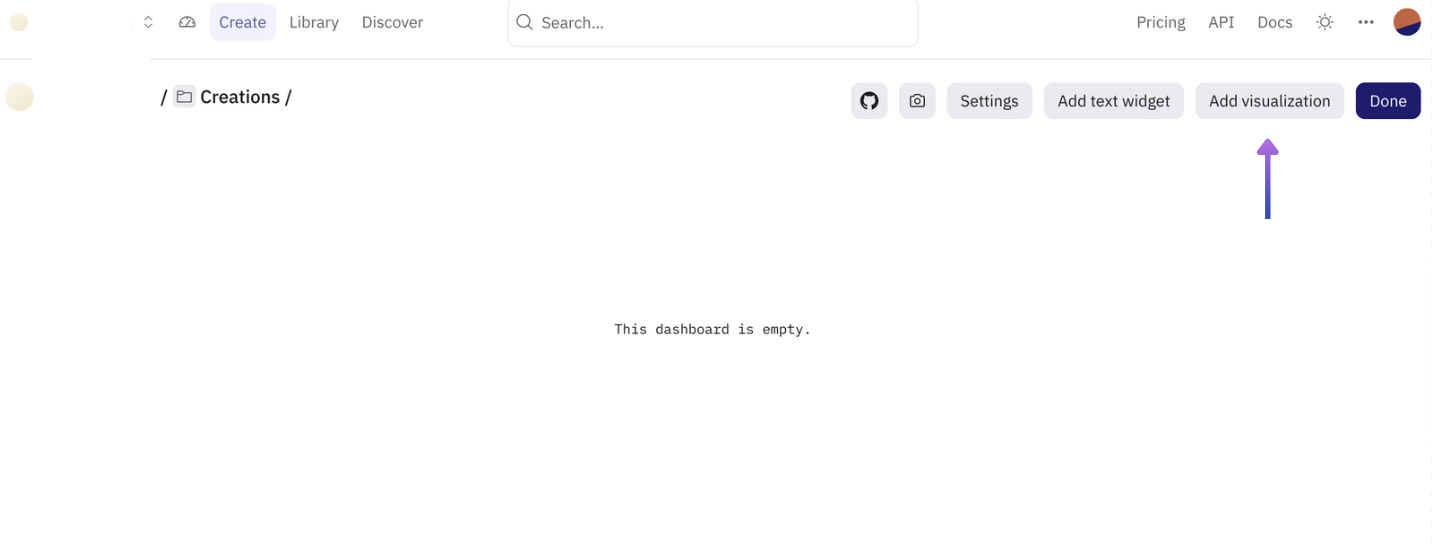 各クエリごとにモーダルで名前を検索し、`Add`を選択、モーダルで`Done`、ダッシュボードでも`Done`をクリックします。
これで、プロジェクトのデータ利用状況をチームメンバーやコミュニティと共有できるようになりました。最後に`Share`ボタンをクリックして完了です。
各クエリごとにモーダルで名前を検索し、`Add`を選択、モーダルで`Done`、ダッシュボードでも`Done`をクリックします。
これで、プロジェクトのデータ利用状況をチームメンバーやコミュニティと共有できるようになりました。最後に`Share`ボタンをクリックして完了です。